The PCW is an incredibly reliable machine that, after 15 years, is still in daily use. Malfunctions are very rare and usually due to wear. The most occurring fault is a failing drive belt. The (first) symptoms are failing to boot from time to time and occasional 'missing address marks'. Without an overhaul it will result in a permanent boot-failure because the worn belt can no longer 'drive the drive'. This rubber belt is the part that wears out the soonest (ten years) but is easy and cheap to replace. The Joyce Computer Club replaces them for NLG 10 and even offers a return service via mail: we send you a revised disc drive and you return your old one. The fact that the JCC can supply this service proves that this repair is a simple one, doesn't it? The drive belt is an industry standard one: the 72-millimetre belt is also used in other drives and even VCR's. Obtaining one abroad (from the Netherlands) should be no problem...
Replacing the belt is easy: remove the back from the PCW and lay it screen-down on a towel or something. Then disconnect the power supply plus data (flat) cable from the drive and unscrew the four screws that secure the disc drive in the case of the PCW. If your screwdriver is not long enough to reach the screw between the drive and the motherboard, you simply lift the motherboard gently out of the machine and let it rest on the monitor. Remove the drive from the PCW.
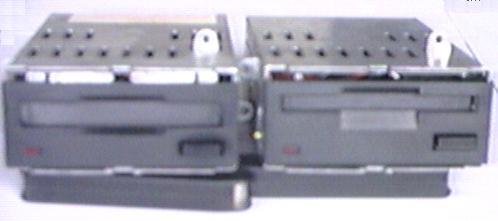
In general, two types of 3" drive can be distinguished: the old type (EME-156 and EME-232) and new type (EME-155 and EME-231). The difference can be seen quite easily from the outside: the old type is fitted in a metal case by means of three screws. The new type also has a metal casing but four screws secure this. Moreover, as can be seen from the picture, the disc groove of the new type is wider than 1 centimetre, whereas the older model has a slit of 7 millimetres. The new models incorporate an improved mechanism that lifts the disc away from the R/W head before the disc is ejected. Thus further preventing damage when a disc is ejected while it is being read by the drive: mind you, this only helps preventing "scratching", there are no guarantees towards the reliability of a file that was written at the time!
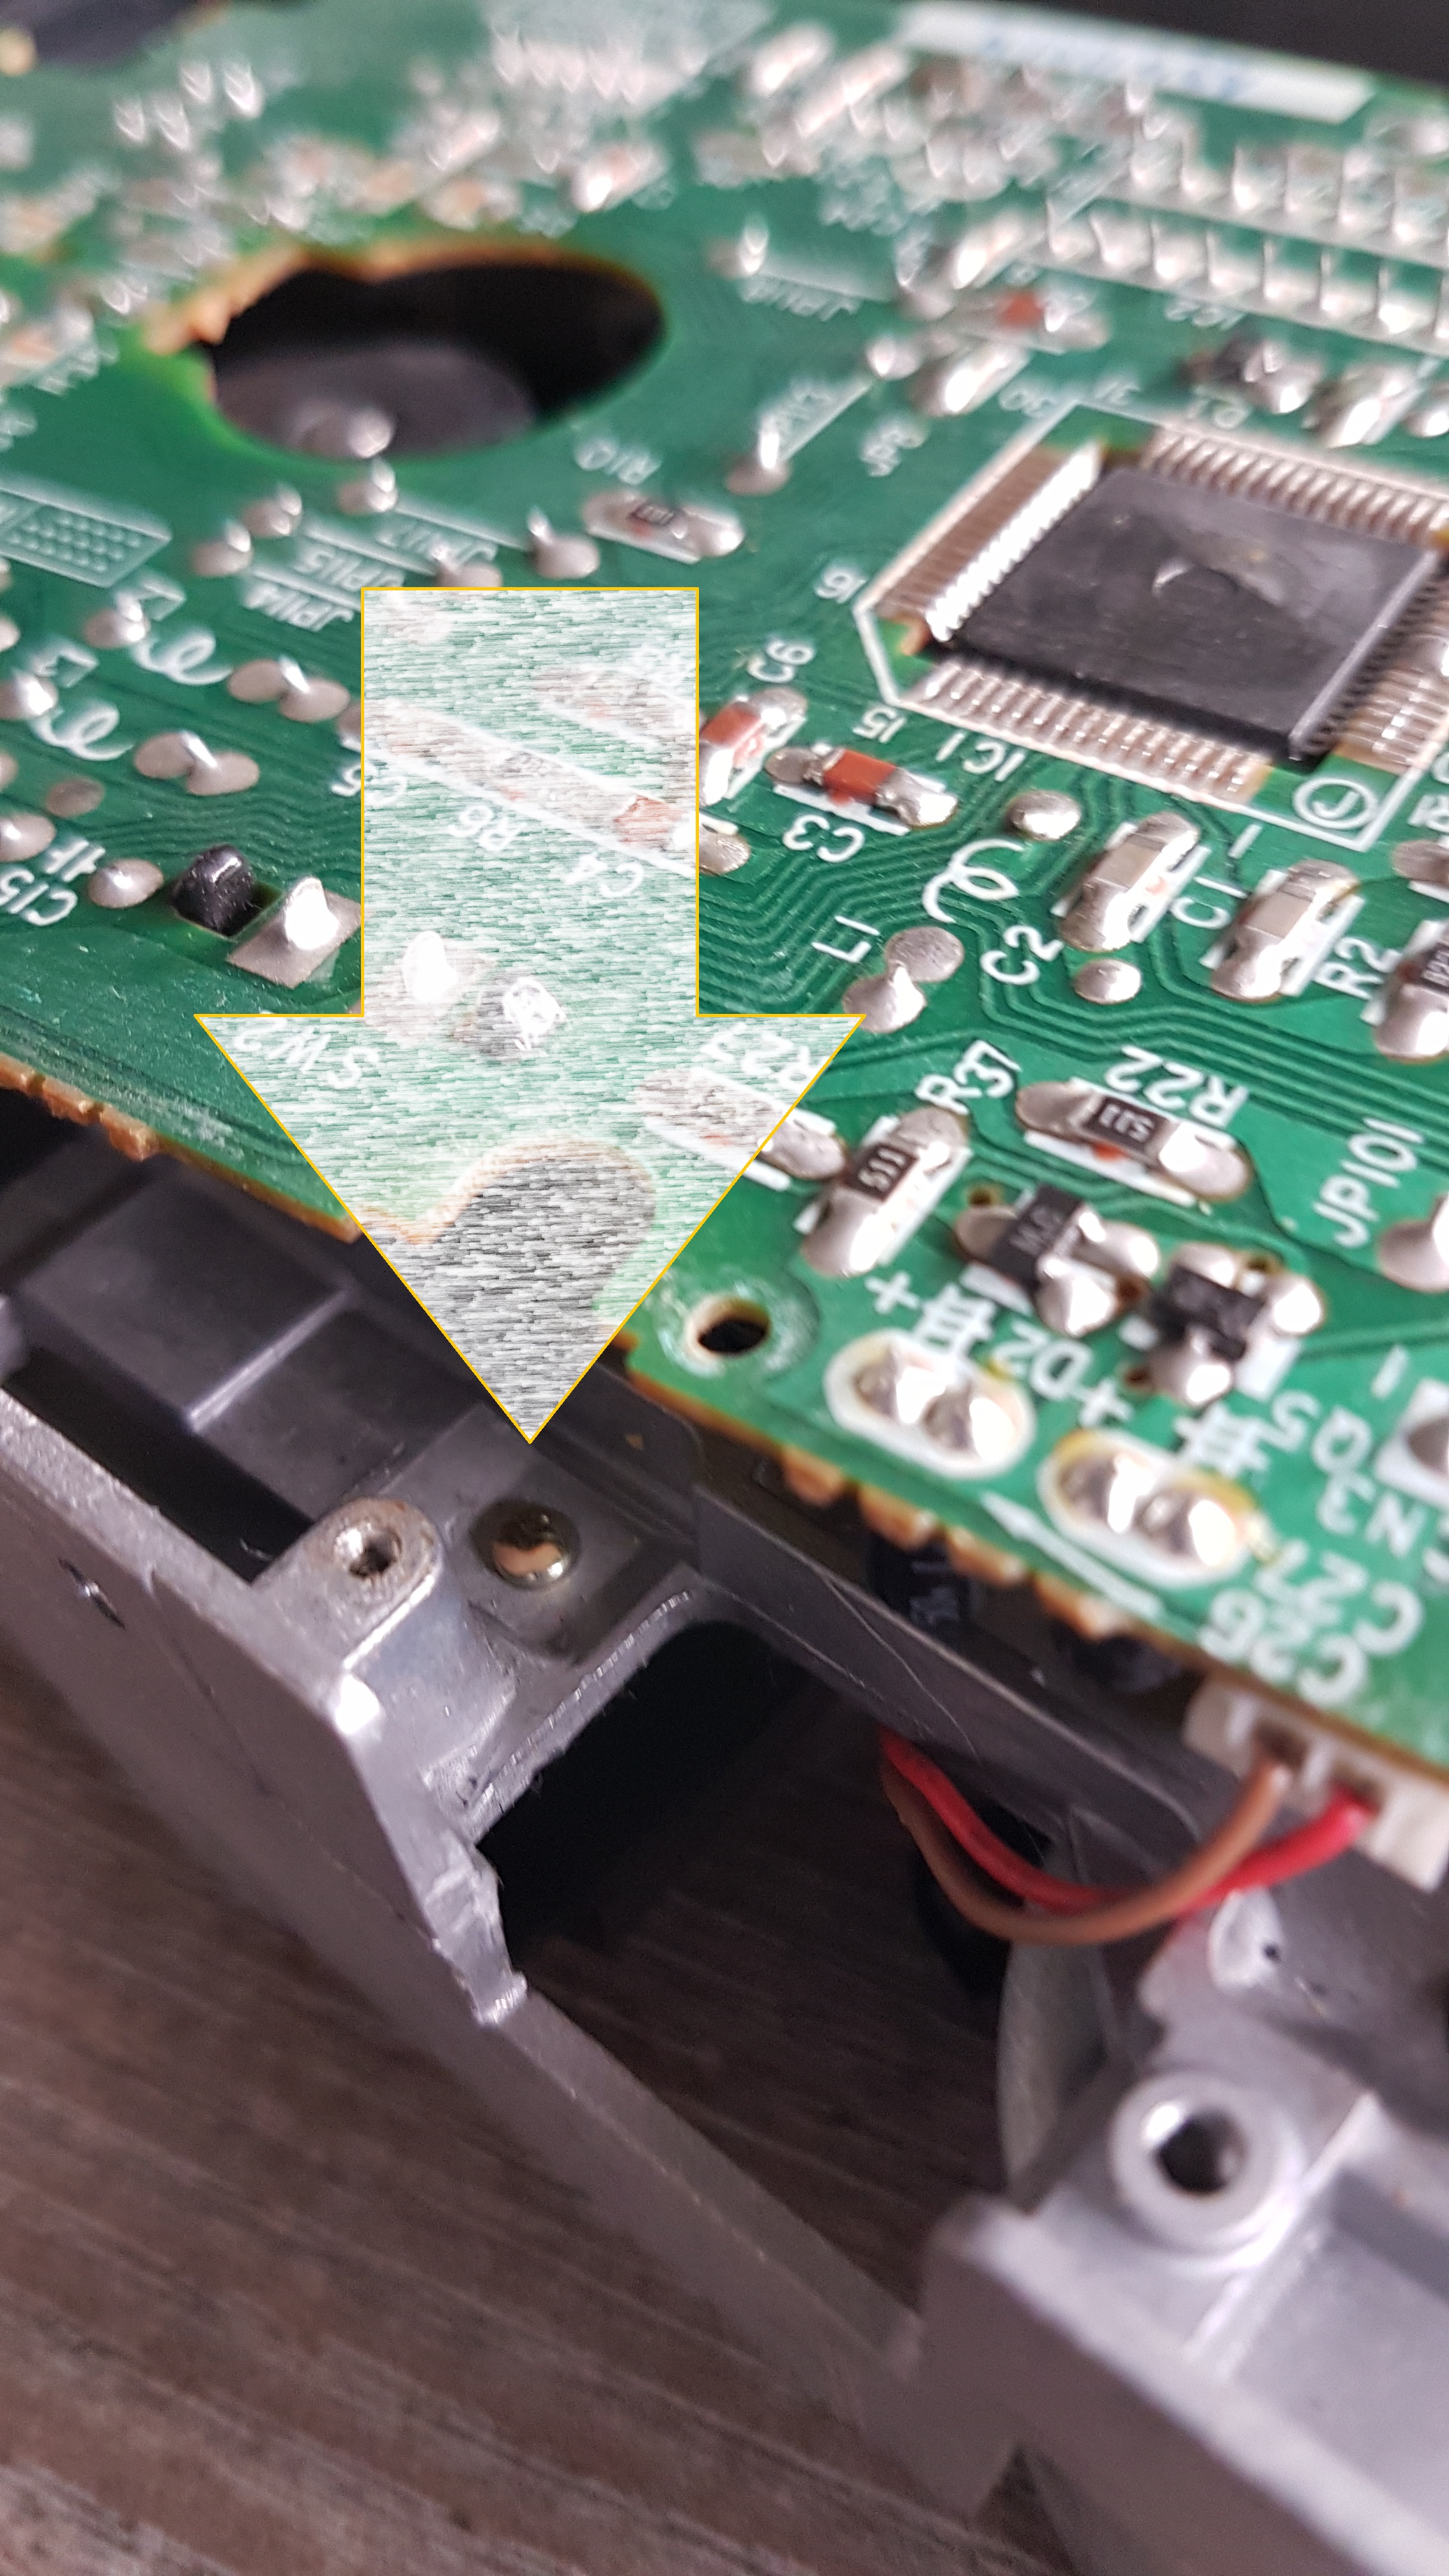
Another improvement in the new model is the detection of the "disc Read or Write status". The old model uses a mechanical pin to determine whether the disc is suitable for writing or not. Depending on the position of the R/W slide on the 3" discs the detection pin will fall into a hole of the disc or will be pushed down (that is, in the picture: upwards) short circuiting a lever mechanism. Without a connecting mechanism the drive will not be allowed to write to the disc. See the photo along with the arrow pointing to the pin.
However, the detection pin, marked out in a red ellipse in the picture on the right, can drop from a disassembled drive quite easily, so find out what model you are dealing with before you remove the metal casing.
The later models all use Light Emitting Diode (LED) detection for this purpose and do not carry loose components that may fall out. Three tiny screws secure the Printed Circuitry Board (PCB) in the old type; the newer models have two. Remove the screws from the PCB to be able to lift the PCB from the metal housing.
Note: the EME-155 and 156 disc drives are used in the Amstrad/Schneider CPC computers as well, without the metal casing which is required for integrating the drive in the monitor of the PCW (for the 8000 models).
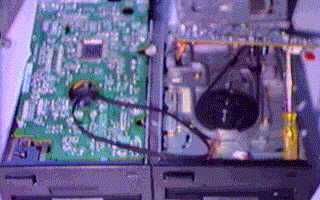
The picture shows the trick how to lift the PCB of a new model without having to disconnect vulnerable cables and connectors. It is recommended that you take the usual precautions when dealing with electronic circuitry. Slide the card backwards and up until the hole in the middle glides over the axle of the drive (see the left drive). The red LED (shown on the top right of the picture) slips out of the black front panel. Then reverse the movement and lift the card up as shown on the right. Well, actually not that high: for the purpose of this picture the LED connector has been removed. Without removing this vulnerable cable the print can be lifted about 4 centimetres, enough to do the job. Use a pair of tweezers or a small screwdriver to replace the belt and re-assemble the PCW.
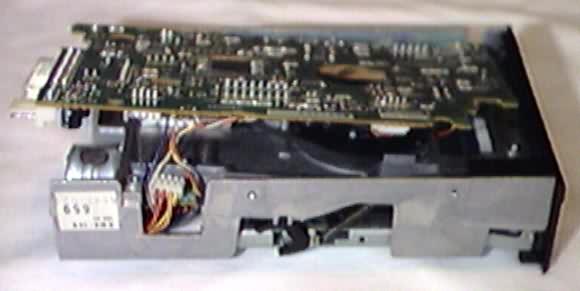
Owners of the old type of drive should (gently) disconnect two connectors from the sides of the PCB. One 2-wired white one and a 4-wired white connector. Next to the 4 wired connected is a cable holder that holds a multicoloured set of 5 wires: bend it slightly to release the cables and get some working space. See the picture, showing the 4-pins connector and the set of wires. Then slide the PCB partly off as far as it will go: the sides usually offer the best access to the internals of the drive. The picture shows the maximum height to which you can lift the PCB without damaging internal cables (not all of the cables have connectors: two have been welded!). Replacing the belt and cleaning it is possible, though. Do not forget to connect the cables again when the job is done and watch for the tiny R/W pin: without it the drive will read but it will no longer be able to write to a disc! Ready for the next 10 years...
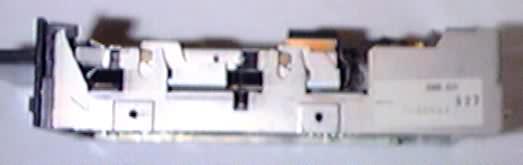
A new 3" drive model, an EME-231, in a position of rest. The 3" disc is partially out; the ejector button on the lower, left side is in the housing and the second Read/Write head (the gold coloured rectangle in the upper right part of the photograph) is up. The shape is the only outer mark that evidences that this is indeed a double sided, 80-track disc-drive (generally known as a 720kb drive) and not a single-sided EME-155 drive. A 173kb drive has only one R/W head and a dummy head-arm that serves to holds the disc in place.
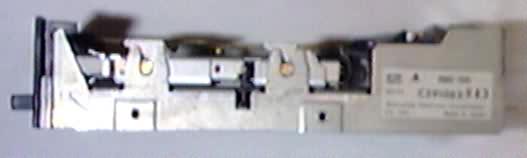
Disc inserted: the ejector button is now sticking out. The disc carrier mechanism has been lowered completely and the R/W head is down and touching the floppy disc. Upon inserting a disc, a hook will open the metal shutter plates from the 3", thus exposing the floppy inside to the R/W head. In this case from both sides, as it is a double sided drive.
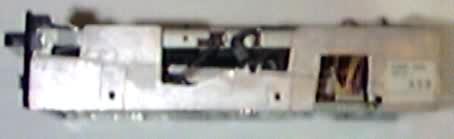
The old type, EME-156, without a disc (fully) inserted. In combination with the mechanical R/W indicator this model is inferior to the 155 and 231 models. It is rumoured that a large, cheap stock of these drives lured Amstrad to fitting the Panasonic 3" instead of the Sony 3.5" format. It also offered the additional advantage that the power consumption was rather low. Most Joyce's have a single (under powered) power supply that supplies the machines with the three different voltages required. The EME-232 drive (similar mechanism) is used in the Amstrad PCW 9512, and is an 80-track double sided drive, much like an EME-231 but it is hard wired as an A drive (rather than the B drive wiring of the 231 which is meant as drive B for the PCW 8256/8512). The pin-connections 4 and 6 differ. Because it is meant for the 9512, the metal case differs from the other three models (picture not yet available).
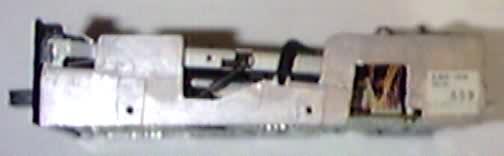
The 3" disc fully inserted into the older model disc drive. As with the new models, the ejector button is now sticking out. The disc carrier mechanism has, however, not been lowered in a true horizontal way. The mechanism is making an angle, forced by the plastic hooks on the sides.
I am not sure whether it is indeed due to this mechanism but the EME-156 is not very tolerant towards the cheap, white label, 3" discs (which are usually lighter and slightly thinner).
 To the left is a sharp picture, by courtesy of Norbert Roll.
The resolution and contrast is a lot better than my old Canon (still video: a resolution of 640*480) pictures.
To the left is a sharp picture, by courtesy of Norbert Roll.
The resolution and contrast is a lot better than my old Canon (still video: a resolution of 640*480) pictures.
I have upgraded to a 5 megapixel camera some time ago but I still need to undertake the task to renew and update the older photographs on my website.
Besides the lower resolution, the contrast needs upgrading as well. I intend to replace all older pictures of lesser resolution eventually but I am glad to be able to use somebody elses high resolution snapshots in the meantime!
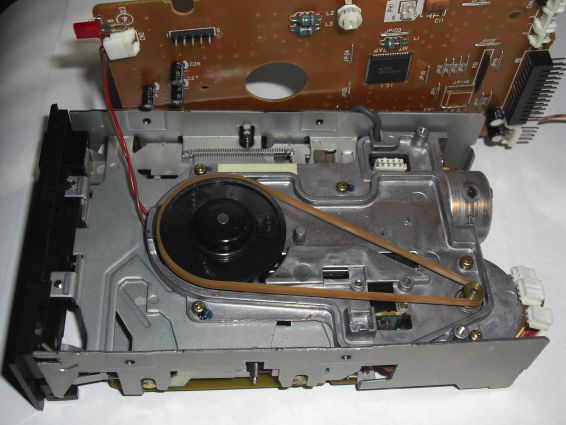
Now, I am not quit sure if this is an older type of new one. I do not know the particular model number and am not familiar with this drive: it has a deviating color (brown printed circuit board) and the location of the wires is slightly different.
From other pictures I received from Norbert Roll I can determine that it is a PCW-drive for sure: it has the two metal housing cases used with the PCW only.
The drive belt too is of an unfamiliar color: I only saw them in one colour before. It is like Henri Ford said about his T-Ford: it can be supplied in any colour, as long as it is black... And this belt is definitely brown! But the different color does provide a welcome contrast to show the location of the belt.
Calibration of 3" drives.
Calibration on 3" drives is a bit of a problem. Basically, it bears down to one computer not being able to read the disk written by the other, although they are of the same model and type. This has to do with the aligning with the read and write heads of the drive. Although I have met the problem a few times, I have always avoided it by replacing the drive with another, more docile, specimen. The simple solution...